Duke's Rehab of the CABO 204 Centercon...

This section is for our members to talk about things not actually about fishing or boating. However, please read the Code of Conduct before posting.
Image

Moderators: bman, Chalk, Tom Keels

DukesFin
Posts: 94
Joined: September 16th, 2007, 7:41 pm

Re: Duke's Rehab of the CABO 204 Centercon...

Post by DukesFin »

Okay, some progress with pictures!

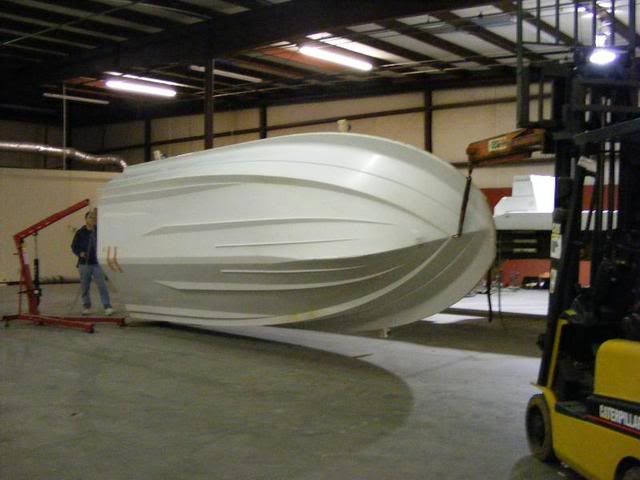
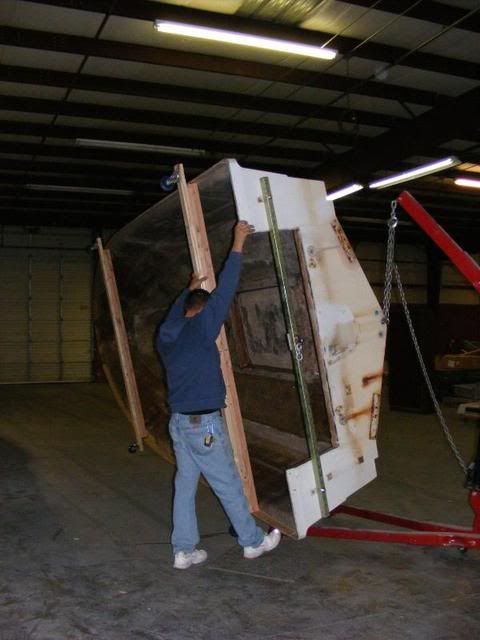
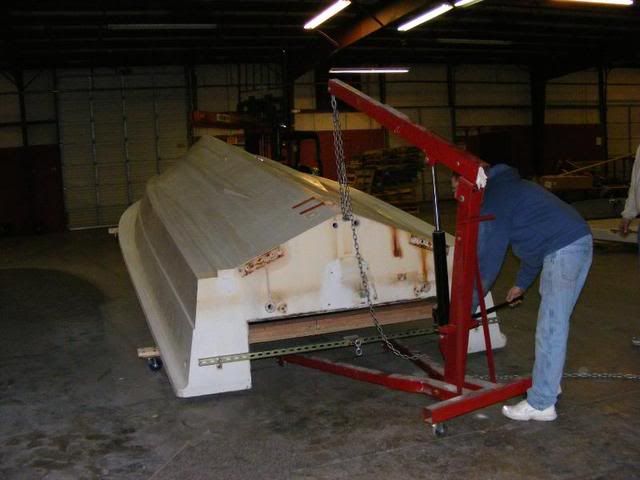
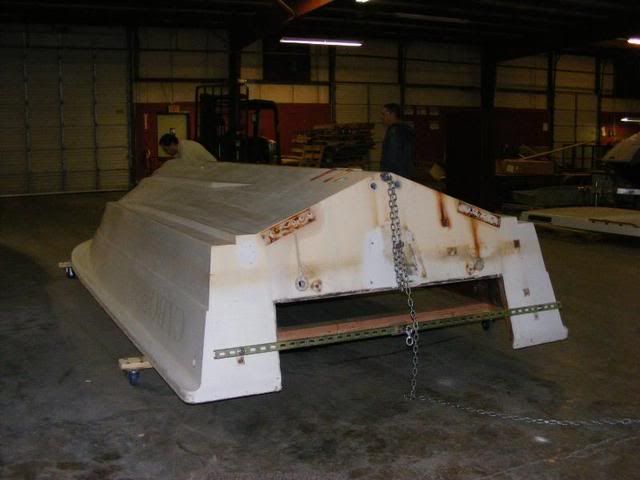
I had to rig up a way to lift the transom of the hull so I could remove the trim tabs as well as preparation to flip the hull for paint/prep once my transducer shell gets installed... Here's what I came up with:
Image
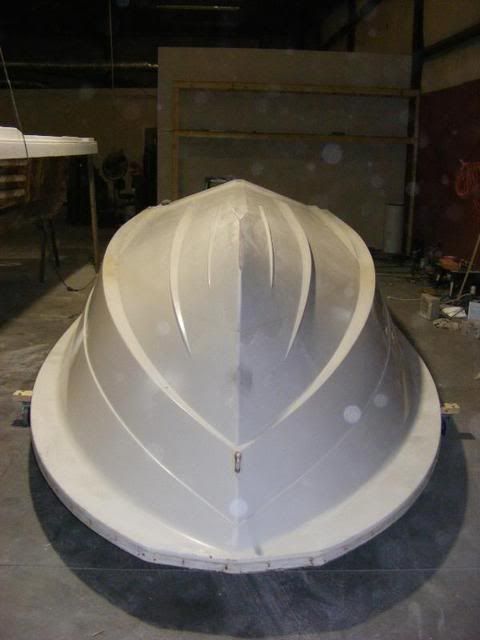
You can also see the way I'll be able to move the hull around after the flip (the 4 casters and 2X4's used).

I tested it out with the engine hoist and it works great.

Now, on to the transducer shell...

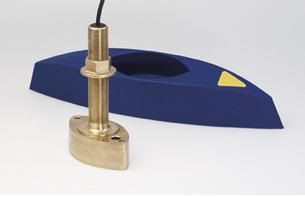
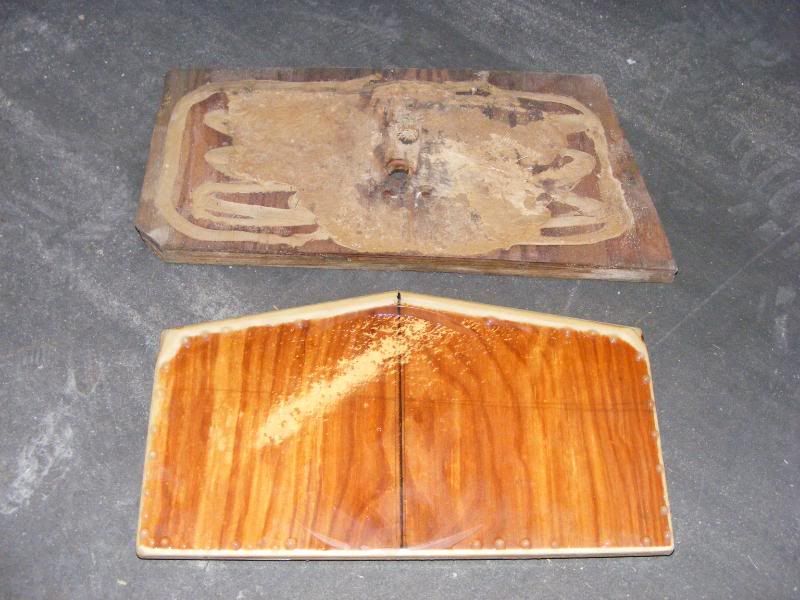
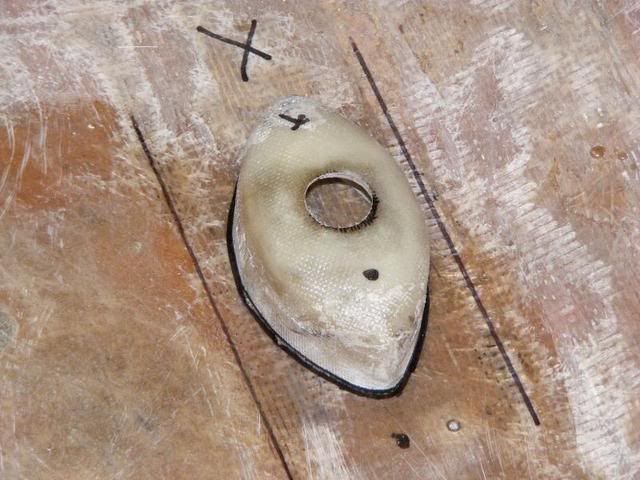
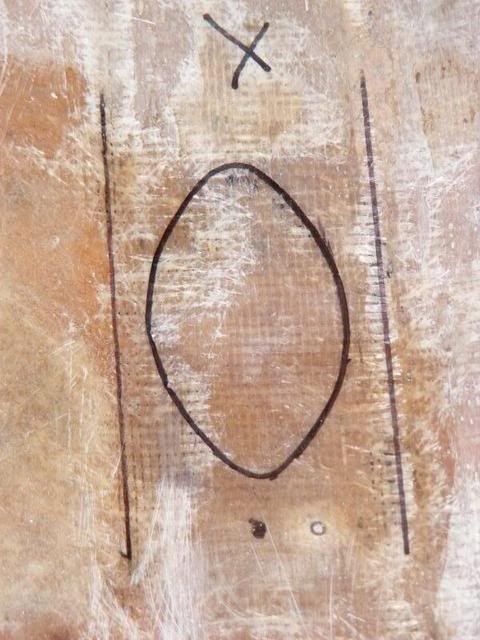
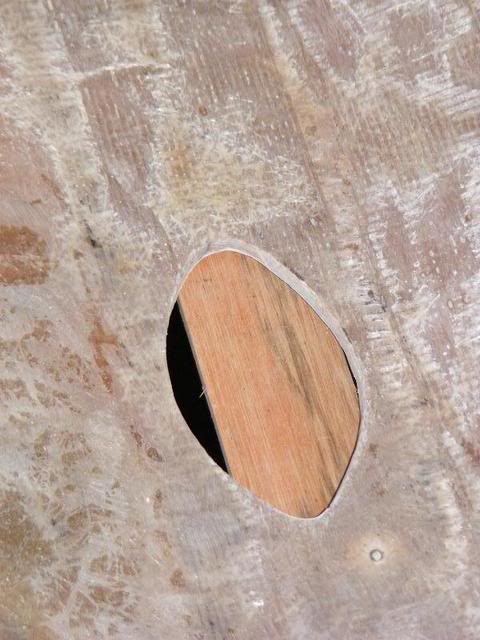
As I mentioned, I made a plaster cast of the slot the transducer fits into of the high-speed fairing from Airmar. I used that for the mold for fiberglass. I've got about 5 or 6 layers of glass that make up my shell now. The pictures don't show the additional sanding and further layers of glass that the shell now has, but it's installed or rather "tabbed in" with an epoxy "peanut butter" on the inside. Tonight, it will get 5 layers of fiberglass cloth over it, each layer larger than the other with the final piece being about 2' square... Here are the pictures of me laying it out to cut the hole as well as the hole now cut...

I needed to draw an outline of it so I could accurately cut the hole and make sure it's centered well:
Image
Image

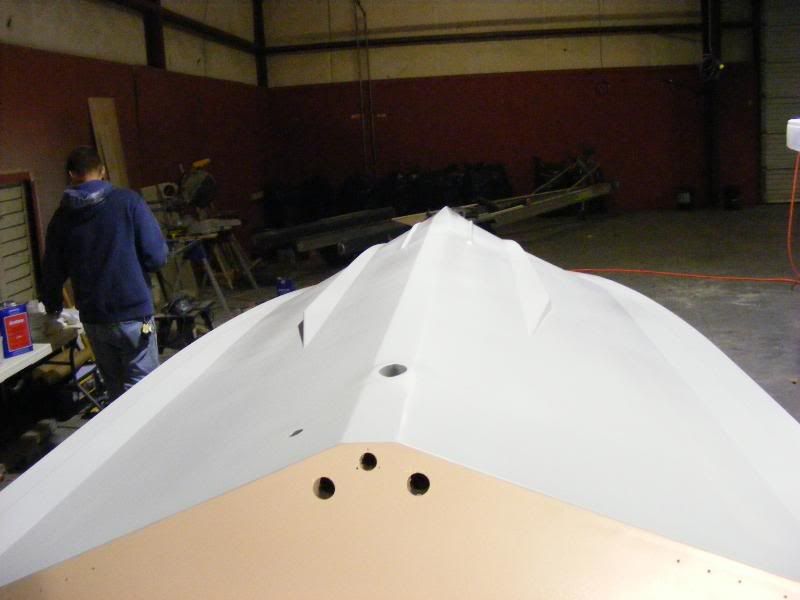
And here's the gaping hole I put in the keel of my boat (with the 1/4" ply I used to put the shell 1/4" under the keel for proper fairing and glassing on the planing surface:
Image

You can see the 1/4" ply system better here:
Image

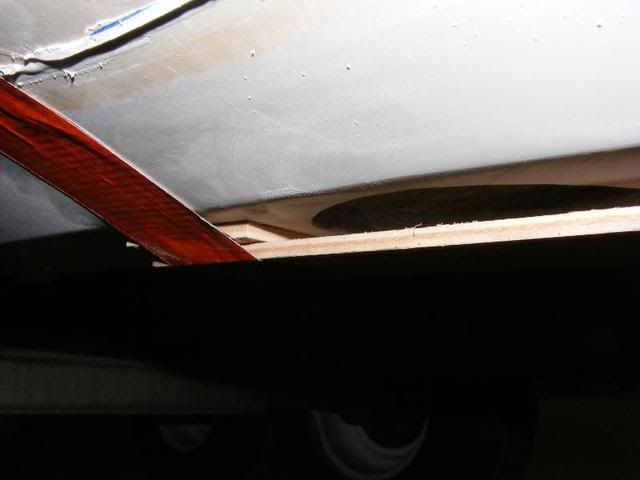
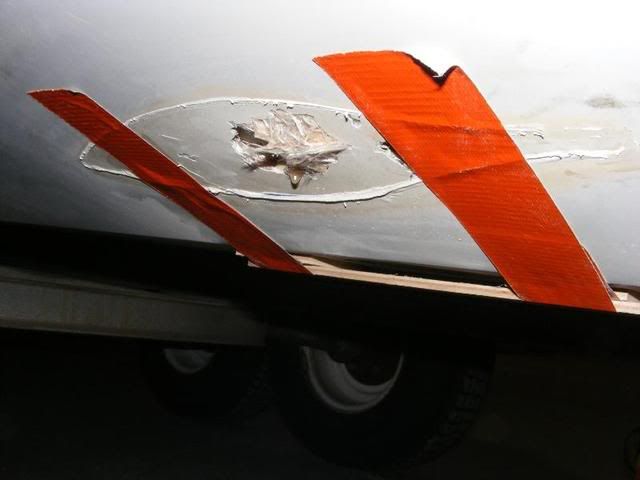
Once I flip the hull, I can do all the glasswork needed from the underside without laying on my back. It will be a LOT easier working from on top! Also, you can see where the high-speed fairing was installed using 5200... That stuff STICKS very well! Now I've got some fixing to do on the previous install, but compared to everything else, that fix will be very easy!
Image

For the whole transducer shell installation and fabrication, I'm using epoxy instead of poly resin because I want the BEST bond possible and poly resin only offers a mechanical bond. There are some very good debates about using epoxy over poly and really it boils down to surface prep and they both come out ABOUT the same if poly is prepped right, but since this is a big hole in the hull, I didn't want to leave anything to chance, so I went with epoxy resin.

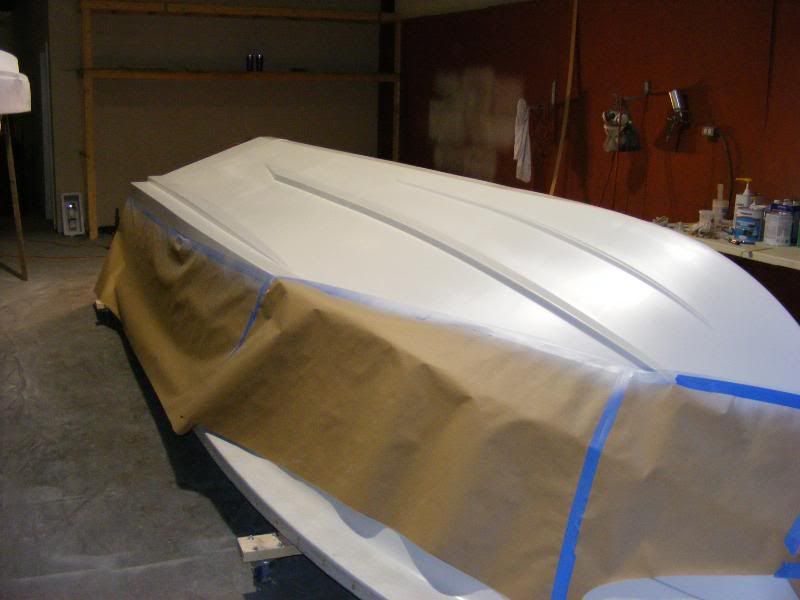
Another note about the bilge area... I'm not done glassing that whole space in. Once I've got the transducer shell completely installed, flip the hull, paint it, then flip it back "right side up", I'll be doing 2 more layers of glass over the whole bilge, then prepping it for paint.

Anyway, more reports to follow!
User avatar
Tidedancer
Site Sponsor
Posts: 2741
Joined: October 2nd, 2002, 7:30 am
Location: Carrabelle Beach, FL

Re: Duke's Rehab of the CABO 204 Centercon...

Post by Tidedancer »

Looking good Duke. That is a lot of work on the transducer. I know it's all hind site here but why did you not use a flat style transducer from Airmar?
You want to make sure that the leading edge of your new transducer housing will not cause any bubbles that will go under the unit. If this happens. your screwed. You will only get readings at very slow speeds.
I know you have already put a lot of work on this and you have the transducer, but anything can happen to that housing out in the blue. You hit something and if it gives you have one large hole.
Just a few thoughts on that Bro.
DukesFin
Posts: 94
Joined: September 16th, 2007, 7:41 pm

Re: Duke's Rehab of the CABO 204 Centercon...

Post by DukesFin »

I hear you Chuck! The PO of the boat installed that high-speed fairing... well... let's just say it was wrong at best. Low speed was the only way it read. He didn't use one of the bolt holes (factory made) in the fairing and made one of his own and did a horrible job cutting it at an angle, so it just would never have read right.

When I'm done glassing that shell in, that will more than likely be the strongest part of the hull. When it comes to work below the waterline, I tend to "over-do" things, if that is possible!

Transducers (thru-hull or transom mount) all have their limitations, but when i'm done with this install, I'll have pictures of how smooth water will flow over the work I'm doing. It's going to be a lot better than a factory install of the high-speed fairing.

If I hit something, the chances of the transducer or shell being knocked off are slim compared to the high-speed fairing. There's just less profile as a "target" with this new installation. Besides that, unless I'm really up on plane, since it's now in the keel, objects/the boat tend to flow or move away from the keel (especially with 22 degrees of deadrise), so again, the transducer and "hole" in my boat are safer now than they were with the high-speed fairing.

The transducer I've got is flat... On the bottom "reading" surface at least. When I go to install it, it will be perfectly flush with the bottom edge of the "shell" and the shell edges will be glassed and faired smooth as a baby's but. I noted the shell hangs down 1/4" below the keel... Well that 1/4" gets tabbed in and glassed in, feathering out to about 6 to 8 inches, so it will eventually look like a dolphin's belly when done!

Keep the comments, concerns and questions coming!

FWIW, here's the transducer that I have (just the brass part - the other part is the high-speed fairing)... It gets installed from below, pulled up into the shell I made. I don't have budget for a new transducer and this one's reliability and quality is proven, so I'll be much happier when it's reading ALL it can!
Image
User avatar
mullet
Posts: 128
Joined: December 11th, 2001, 8:00 pm
Location: Albany, Ga.

Re: Duke's Rehab of the CABO 204 Centercon...

Post by mullet »

I went with the 1k shoot thru rather that cut that hole. The only issue there is air bubbles in the hull so you have to test it before glassing. I've been pleased with it so far. Airmar and Furuno said if I was reading bottom in 1000 feet I'd never know the difference, and may not then. As I understand it, it's the same transducer, in a mineral oil bath. The work looks tight so far!
DukesFin
Posts: 94
Joined: September 16th, 2007, 7:41 pm

Re: Duke's Rehab of the CABO 204 Centercon...

Post by DukesFin »

I was reading your post on the GW forum and was impressed with the install! :beer:

My problem is that I'm not buying a new transducer. I'm using the one that was installed (horribly) with the high-speed fairing. The transducer I have works fine, if it's installed properly and the previous install left more than a lot to be desired. I had turbulence/bubbles at anything over idle. I could have spend a couple hundred on a new HS fairing from airmar, but like how streamlined this installation is.

:thumbup:
DukesFin
Posts: 94
Joined: September 16th, 2007, 7:41 pm

Re: Duke's Rehab of the CABO 204 Centercon...

Post by DukesFin »

Well, the hull is now flipped and resting in her new home under the light for repairs, fairing, prep, then paint... The process of the flip was a bit hairy at times. You know how you plan, plan and plan some more, then ask for feedback to find what you missed? Everything looks good to go, then once you get into it, you see everything you missed? Well, this was the case. I was worried about the bow and weight transferring as the flip was going on, but it turns out that the problem area was the transom. The bar I put on the transom was much higher than the center of gravity, so we had to fashion a connection for the engine hoist into the drain plug hole. Once we did that, the flip went great. I'll be able to use my "bar" for the flip back upright though...

Here are the pictures of the hull-flip:

Got the fork lift on the bow and engine hoist for the transom and the flip began. I'll let the pictures do the "talking":
Image
Image
Image
Image
Image
Image

After it was flipped, I sanded and ground-out all the blemishes, problem areas, etc. Tonight, I'll be mixing up more epoxy and cutting/installing new glass where it needs it. Tomorrow I'll begin sanding in preparation for the Interlux VC Performance Epoxy. I just have to figure out how to tape off the areas around the chines so that it's nice and even!!!
User avatar
qoutrage
Site Sponsor
Posts: 2114
Joined: July 18th, 2004, 12:28 pm
Location: Carrabelle

Re: Duke's Rehab of the CABO 204 Centercon...

Post by qoutrage »

Morning Duke..nice work with the fairing. As you say, over building below the w/l is a good thing. Thanks for the update.. Looks good. :D
User avatar
Tidedancer
Site Sponsor
Posts: 2741
Joined: October 2nd, 2002, 7:30 am
Location: Carrabelle Beach, FL

Re: Duke's Rehab of the CABO 204 Centercon...

Post by Tidedancer »

Looking great so far Duke.
DukesFin
Posts: 94
Joined: September 16th, 2007, 7:41 pm

Re: Duke's Rehab of the CABO 204 Centercon...

Post by DukesFin »

I got the first coat of Interlux VC Performance Epoxy on last night. It was my first time using an HVLP sprayer and it came out pretty good! It's got a little bit of texture to it though. I need to thin it a little bit more so coats 2,3 and 4 go on more smoothly. I went back to it at around Midnight and filled some pinholes with epoxy and did a little more fairing, so after work today I can sand it, then begin the final coats...

I'll take some pictures with the masking removed so you can see the difference. One coat makes it look like a new boat already, so I can't wait for the final coat!!! Meli took some pictures last night, but she missed the actual painting.

The gun I'm spraying with is a HUSKY PRO HVLP gravity feed gun from HD. At $80, it does okay! 40psi at the gun with a 1.4mm tip.

More to come! I'm absolutely DREADING the sanding the topside is going to take... Scroll back to page one and look at the pictures again... You'll see that every hatch has gutters... It's the gutter sanding I'm not looking forward to. Everything else will sand pretty easily with the DA, but the gutters are going to be manual with a foam-pad. EGADS!!! It's going to be worth it though!
User avatar
Tidedancer
Site Sponsor
Posts: 2741
Joined: October 2nd, 2002, 7:30 am
Location: Carrabelle Beach, FL

Re: Duke's Rehab of the CABO 204 Centercon...

Post by Tidedancer »

Keep up the good work Duke. But we need photos to look at to make sure you are doing the right thing. (hee, hee)
DukesFin
Posts: 94
Joined: September 16th, 2007, 7:41 pm

Re: Duke's Rehab of the CABO 204 Centercon...

Post by DukesFin »

Chuck, that's a fear of mine... Post a picture that one of you pro's look at and reply: "Oh, man... You should NOT have done (whatever I did)!!!

EEEEEEK!

Nah, if anything, I think I'm OVERdoing some things to be safe! Thanks and I promise I'll upload/post some pictures tonight or in the morning!
DukesFin
Posts: 94
Joined: September 16th, 2007, 7:41 pm

Re: Duke's Rehab of the CABO 204 Centercon...

Post by DukesFin »

Okay, here's an update with pictures...

I went out yesterday after work and put coat #2 of the VC Performance Epoxy on... Went back at Midnight and put on coat #3, then back again at 5AM and sprayed the final coat.

Here's a shot of my work station... I think it's time to clean/organize again!
Image

And the sprayer I'm using (there are no monkeys here... the previous occupant had a 240V receptacle that apparently, his employees would occasionally plug tools into! It's been disconnected):
Image

Here's a shot of the boat from astern (I think this is after the 2nd coat):
Image

And a shot from forward (taken after the first coat, I think):
Image

Can you see the difference (before/after)? You can see where I left 1/8" of my sanding with no paint... Wanted to be sure I was painting on a prepped surface:
Image

It's got some texture to it. A bit less than some albative bottom paints I've seen. I will probably leave it as it is since I'm not racing and I really don't want to go the "wet-sanding" route on here. You can wet sand to a high-gloss glassy finish if you want... Check out my "eggshell" texture:
Image
We played with air flow, paint flow as well as going up to the max 10% spraying reducer and it did get better. I'm happy with it. Sure looks like new to me!!!
DukesFin
Posts: 94
Joined: September 16th, 2007, 7:41 pm

Re: Duke's Rehab of the CABO 204 Centercon...

Post by DukesFin »

Oh, I did build a new backing plate for the anchor roller and lifting eye... See if you can tell which one is the old one and which one is new:

Image
User avatar
Cranfield
Site Sponsor
Posts: 1922
Joined: December 12th, 2001, 8:00 pm
Location: Romney Marsh

Re: Duke's Rehab of the CABO 204 Centercon...

Post by Cranfield »

I love work, I can watch someone doing it all day. :-D

Despite knowing nothing about boats, DIY and a million other things, I am really enjoying this thread.
Keep it up Dukes. :thumbup:
User avatar
Ranaman
Posts: 529
Joined: December 12th, 2007, 4:44 pm
Location: Raleigh, NC

Re: Duke's Rehab of the CABO 204 Centercon...

Post by Ranaman »

I agree with Cran Dukes!! Nice job and keep up the good posts!
Image
Post Reply